
Carving a Spoon with a Flex Shaft
Eric Gorges carves spoons with a Foredom flex shaft. We asked him which of our burs he actually reaches for, and he named two. This is how he works.
"One of the reasons I like teaching spoon carving is everybody knows what a spoon looks like and what it does."
The two burs, and what each one does
A 1" sphere and a 1/2" x 1-1/2" ball nose. Both fine cut, both 1/4" shank.
The sphere hollows the bowl. At 1" across it takes out a lot of wood quickly and leaves a smooth scoop instead of the facets a smaller bur leaves behind. A smaller bur has to work in overlapping passes, and every pass boundary is a ridge you have to sand out later.
The ball nose refines what the sphere started. The rounded tip reaches into the base of the bowl where it meets the handle, and the extra length keeps the shank off your work while you do it.
Why fine cut and not coarse
Fine removes less wood per pass. That sounds like a disadvantage until you sand.
A coarse bur leaves a torn surface that takes three or four grits to clean up. Fine leaves something you can finish in one or two. Inside a spoon bowl, where you cannot get a flat sander anywhere near the surface and every grit means hand work in a curve, that is the difference between finishing in twenty minutes and finishing in an hour.
Picking your stock
Eric works in fruit woods. Apple, pear, cherry. Maple is his favorite and it is what he uses here.
| Wood | Maple. Apple, pear and cherry also work |
|---|---|
| Blank size | 2-1/2" wide, 10" long, 3/4" thick |
| Layout tools | Compass, scale, pencil |
Laying out the spoon
A compass, a scale and a pencil. That is the whole tool list. Draw a center line down the length of the blank first. Everything else references off it.
The bowl
On a 2-1/2" blank Eric draws a 2-1/4" circle, which leaves an eighth of an inch of wood on each side. Set the compass to 1-1/8", anchor it on the center line near the top of the blank, and swing the circle.
The handle
He runs a 3/4" handle. Mark 3/8" either side of center, once up near the bowl and once at the base, then connect the marks down the length of the blank.
The neck
Where the handle meets the bowl you are left with a sharp corner. Eric flares it by hand, on one side or both. It does not need to be symmetrical.
"Don't worry about it being perfectly symmetrical. We're just using this as a template."
Cut it out on the bandsaw and you are ready to carve.
Setting up the handpiece
The H.44T is a collet handpiece, which matters here: these burs have a 1/4" shank, so the handpiece needs the 1/4" collet in it. The kit ships with 3/32", 1/8" and 1/4", so check which one is fitted before you start.
To change it, put the pin through the shaft, unscrew the collet nut, and the collet slides out. Swap it, put the nut back and run it down finger tight, no further.
Stick out
Drop the bur in and hold it out of the handpiece a little before you tighten. Eric runs about 3/8" to 1/2" of shank exposed. Then snug the collet nut with the wrench. It does not take much force.
Getting the handpiece onto the shaft
Step on the pedal and let the shaft spin, then set the handpiece on while it turns and press gently until it clicks. The shaft is keyed, so letting it spin is what lets it find its seat. It takes almost no force.
Hollowing the bowl
Start with the 1" sphere.
Before carving, leave yourself a margin around the rim, 1/8" to 3/16" all the way round. You need that material later when you shape the back.
Start in the middle and work outward in a circular motion.
Pull cuts, not push cuts
This is the one to get right early. Pull the handpiece back toward you, against the rotation of the bur, and you keep control of it. Push it away from you and the rotation tends to pull the tool out of your hand.
"When you're first starting out, try to stick to pull cuts so you're going counter the rotation and you're going to hold a lot more control over the handpiece."
Once you have the feel for it you can cut in both directions. Not on your first spoon.
Burn marks
If the bur is spinning and you are not moving it along, it burnishes the wood and leaves a burn mark. Early on that does not matter, it carves straight out. Near the end, when the surface is close to finished, it does. Keep the bur moving and never let it stall in one spot.
How deep
It depends what the spoon is for. A deep bowl goes as deep as your thickness allowance lets it. A stirring spoon can be much shallower. There is no single right number, only the one that suits the spoon you are making.
Ease off at the end
Eric lightens his pressure noticeably as he approaches final depth. Heavy cuts leave tool marks you then have to sand out, so a light finishing pass is less work than it looks.
Shaping the back
Switch to the 1/2" x 1-1/2" ball nose, same 1/2" stick out.
The reason for this bur is its side, not its tip. There is an inch and a half of straight cutting edge along it, and that length is what lets you sweep a smooth contour into the back of the bowl. You are working with the side of the bur, not the ball on the end.
Work in quadrants
Keep your center line, and redraw it when it carves away. Add a line across the front and you have three reference points: left, right and front. Work one quadrant at a time, blending from the center out and over the edge, then do the matching one.
Feel the thickness
Run your index finger and thumb over the wall as you go. You will feel both the thickness and any high spots long before you can see them, and you can take those out while they are still small. This is why you left the margin at the rim: it is easier to sneak up on the final thickness than to put wood back.
Sight down the spine
Stop and look straight down the handle at the bowl. From there you can see immediately if one side is heavier or the curve does not match.
"If you wait until the end to try to correct it, you're going to have a really hard time with it. So it's better to just catch it early, start paying attention to it and make subtle corrections."
Last comes the nose. Pick up the radius at the front and carry it around and onto each side, sweeping the whole area left to right, then go back to the sphere to clean up the rim.
Carving the handle
Finish the bowl first. Depth and the back should both be close to final before you start the handle, because the handle gets shaped around what the bowl already is.
The goal is plain enough: something comfortable to hold and to stir with.
Take material off the underside first. Carry the line up from the bowl, sweep down the length of the handle, then curl back up at the end. Do the opposite on the top. As with the back of the bowl, you are cutting with the side of the bur, not the tip.
The belly
Taking a little out at the neck and again toward the back leaves a slight belly along the top of the handle. That is what makes it sit in your hand instead of just lying in it.
Then roll the edges over, top and bottom, until the handle is soft the whole way round.
Leave the neck until last
Eric shapes the entire handle without touching the neck, the short run where the handle meets the bowl. It is the easiest place on the spoon to lose the shape you just spent two steps building.
"You really want to just use fine cuts, very little pressure, and just slowly remove the material so as you don't ruin the definition of the bowl."
The last pass
Once it is carved, go over the whole spoon and take out anything that catches your eye or your hand. Light pressure, no hurry.
Sanding
There is no fast way through this part.
Eric works with strips of sandpaper, starting around 150 and going up to 600. If the carving left deep gouges, start lower, 80 or 100, and get them out before you go near 150.
The rule for changing grits is simple. Keep going until you cannot see any gouges and the surface is uniform, then move up. Not before.
"The more time you spend sanding, the better the results are going to be on the end and the smoother it's going to be."
Finish
Anything food safe will do. Eric uses a wood wax, a carnauba type, which brings up the grain.
The cloth has to be white
White paper towel or a white cloth, nothing with any color in it. A colored cloth can stain the wood.
Apply it liberally, then give it a second coat the next day or the day after.
"You can't over finish it."
And that is a spoon.
"I would encourage you to be artistic with your designs and have fun with it. You can never have too many spoons, and they also make wonderful gifts."
It is not only spoons
Eric picked these for spoon work, and that is where the name comes from. But a sphere and a ball nose shape any concave surface.
Bowls, kuksas, chair seats, decoy hollows, relief panels. If you are removing wood from inside a curve, these are the same two burs.
The kits
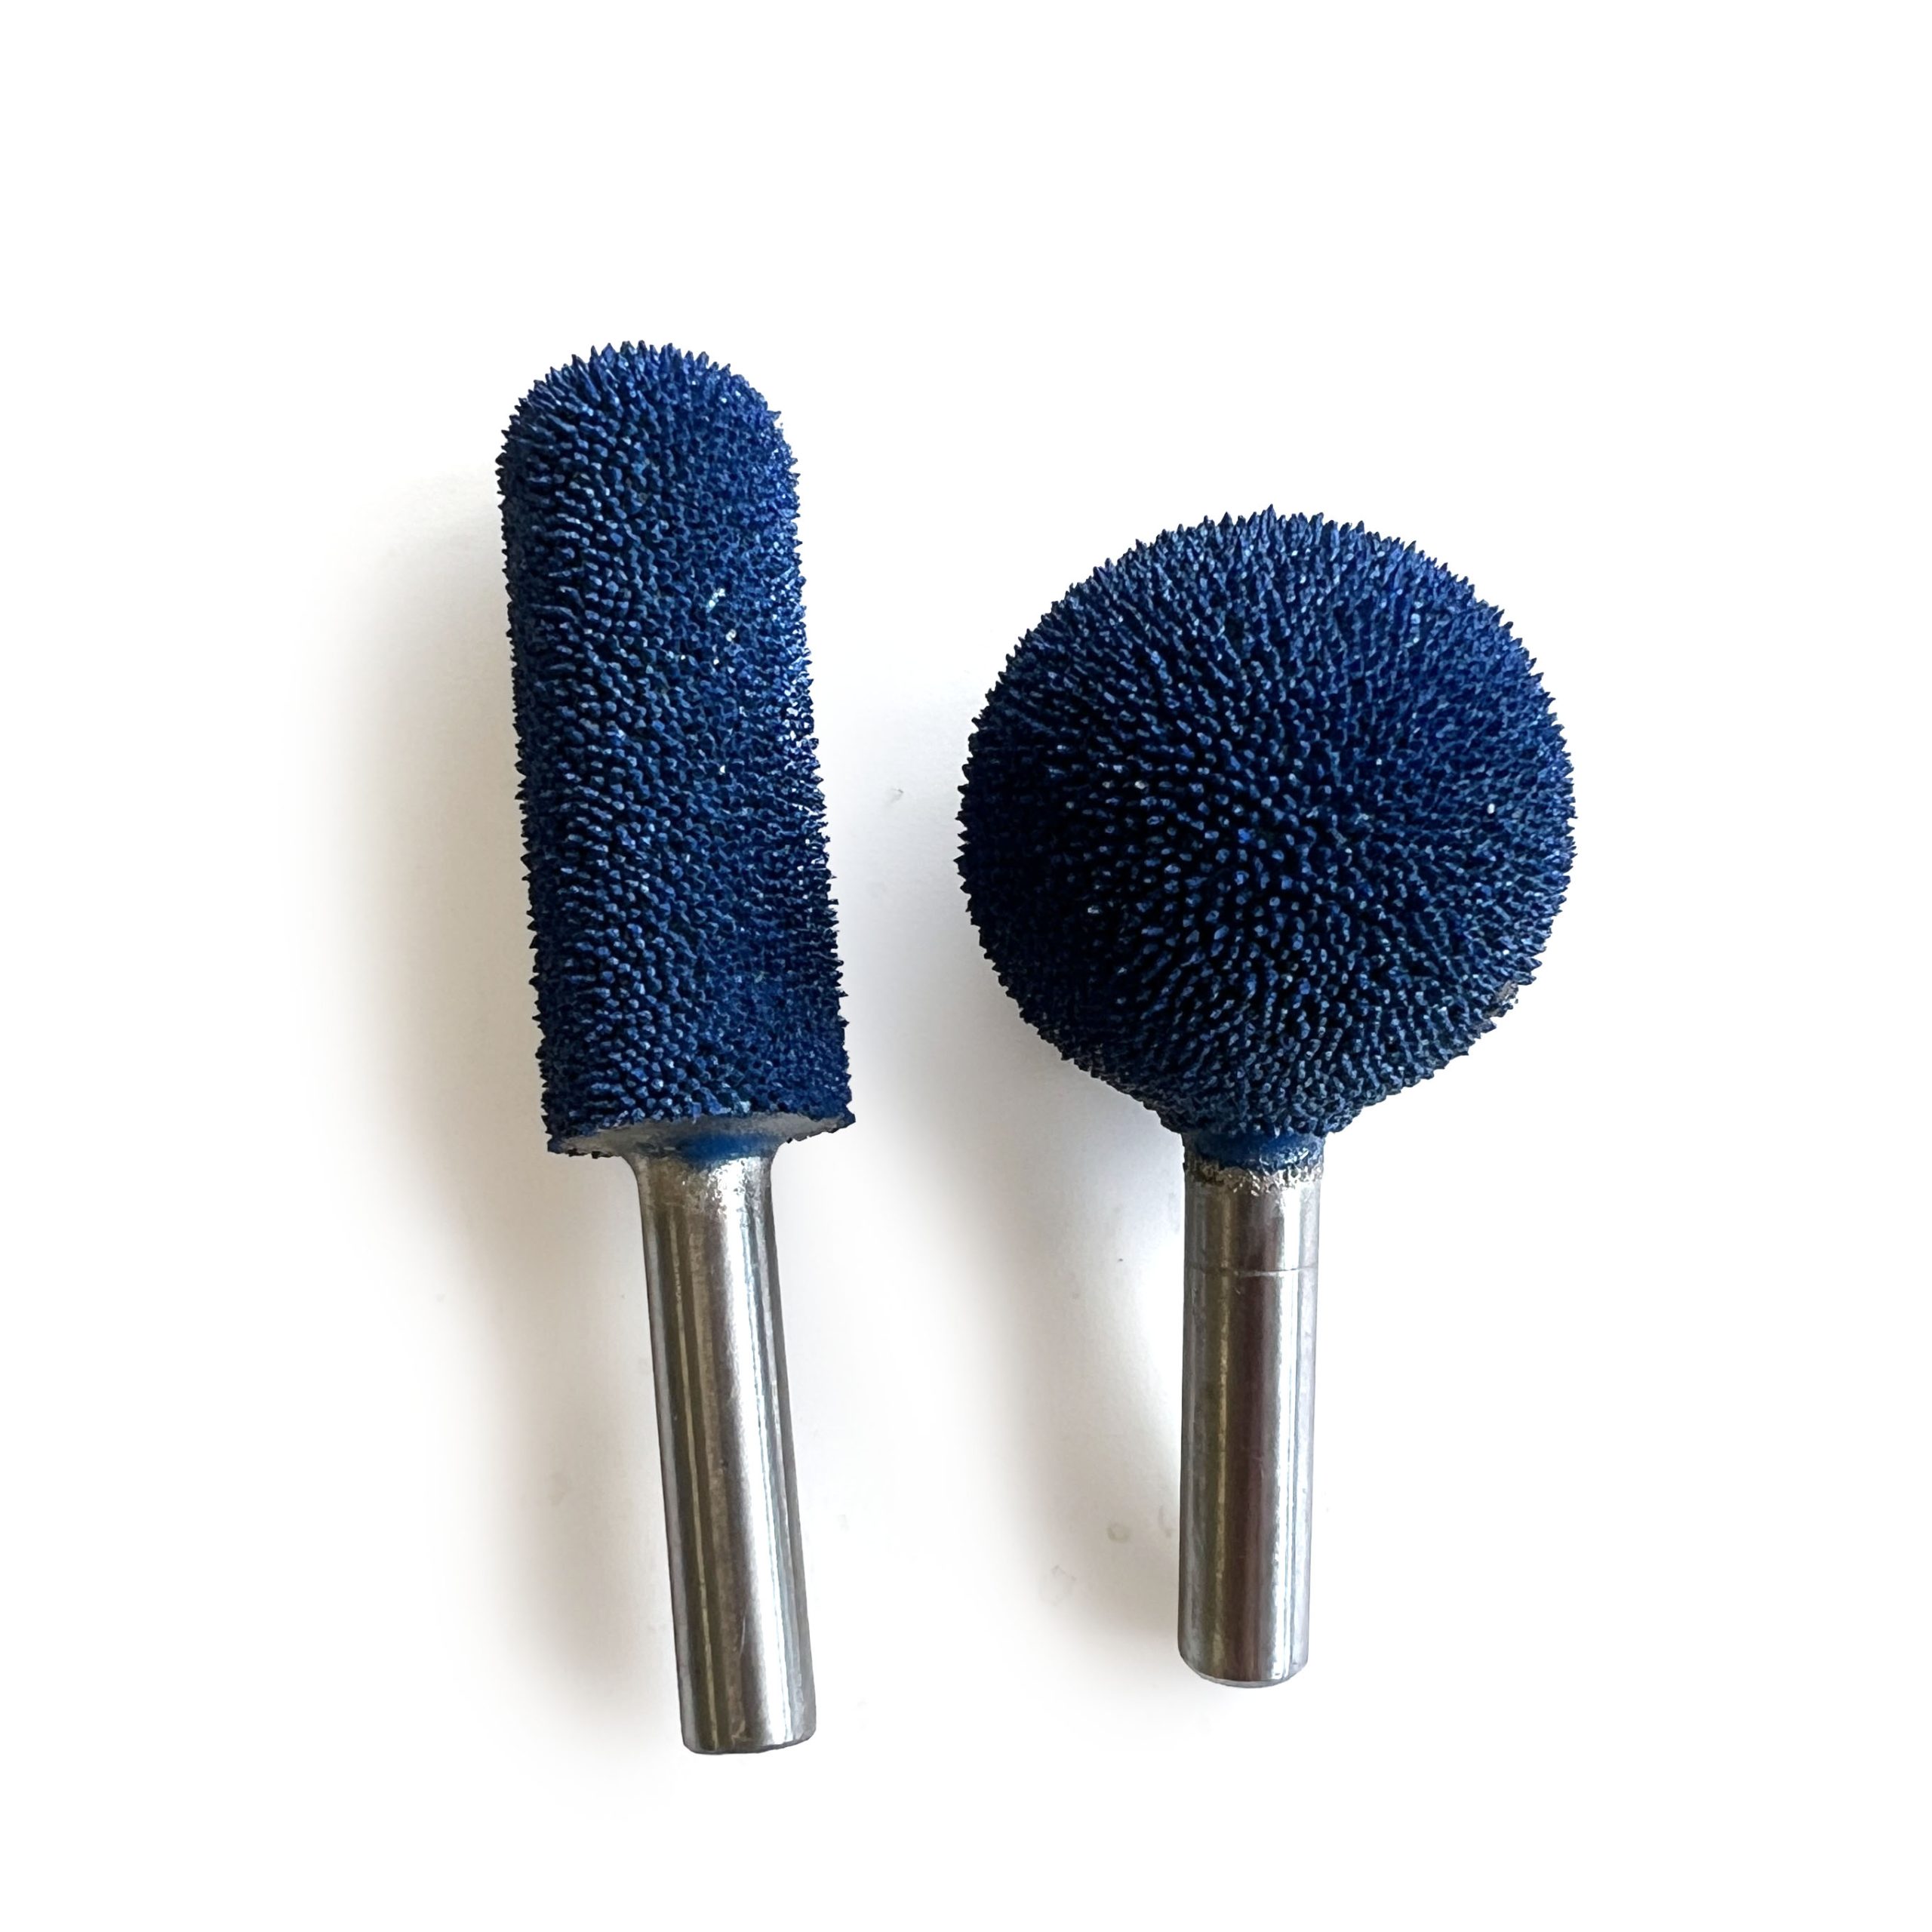
Eric Gorges Signature Series Bur Kit
The two burs on their own, for people who already have a flex shaft.
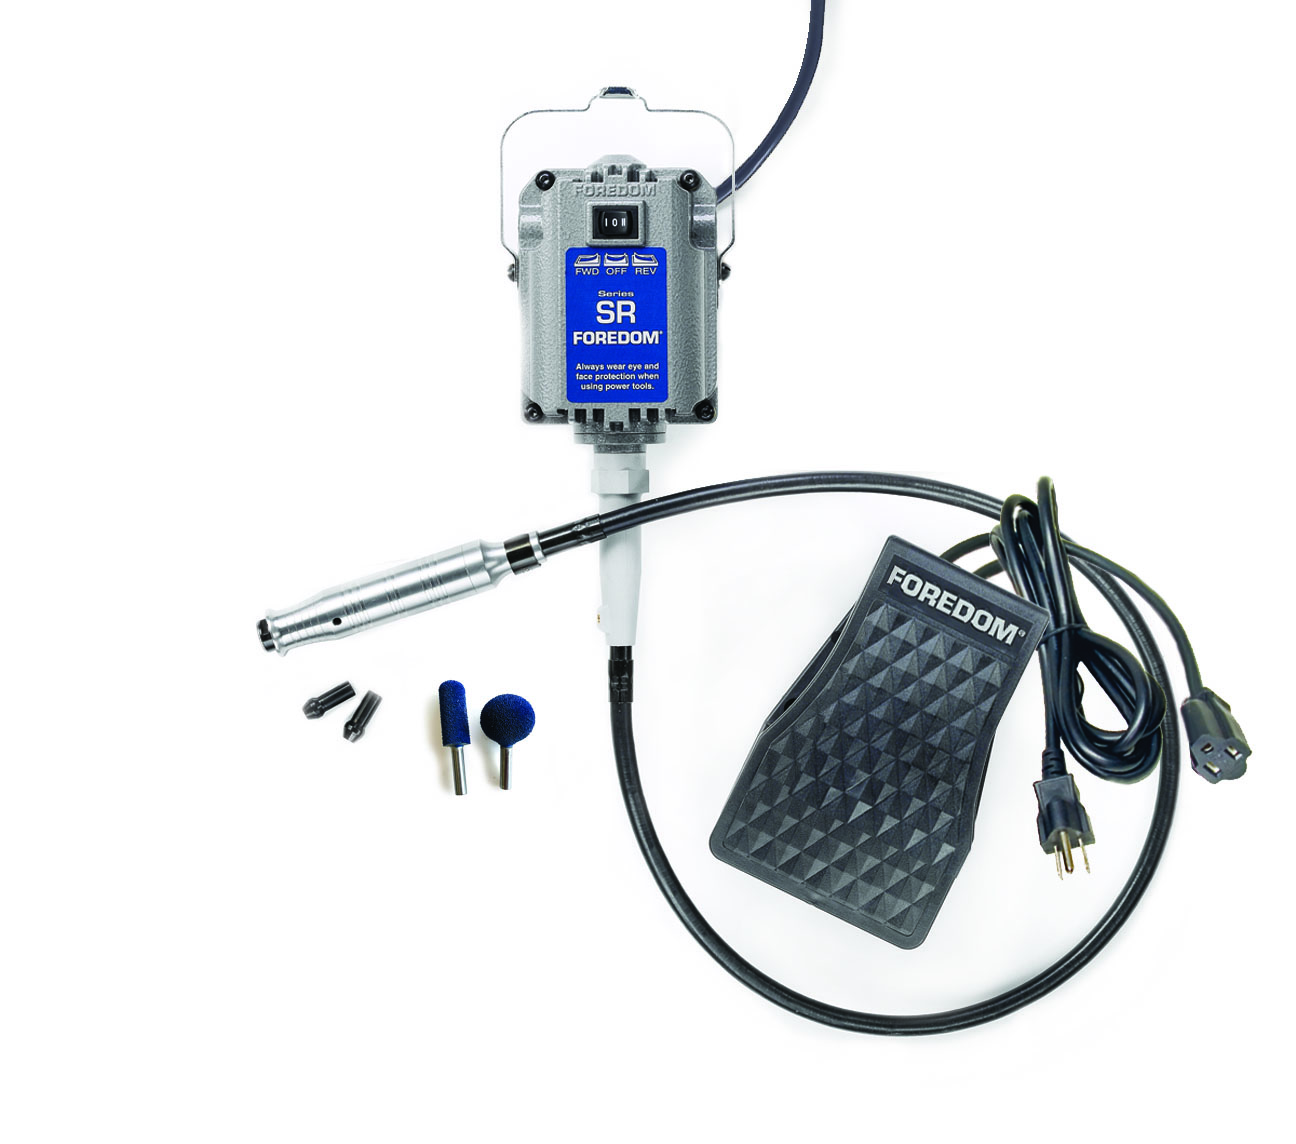
Foredom SR Hang-Up Motor with Eric Gorges Signature Series Bur Kit
Hang up motor, foot control, H.44T handpiece and the burs.

Foredom SR Bench Motor with Eric Gorges Signature Series Bur Kit
Bench motor instead of hang up. Same control, handpiece and burs.
Already own a Foredom flex shaft? Check your handpiece takes 1/4" shanks first. The H.44T, H.43T and H.25 do, and so do their square drive and slip joint versions. The H.30 does not, it tops out at 5/32".
Starting from scratch? Which Foredom flex shaft is right for me.
About Eric Gorges
Craftsman | Metal Shaper | Motorcycle Builder | Woodworker | Television Host | Author
Eric Gorges is a craftsman, metal shaper, woodworker, and custom motorcycle builder with a lifelong appreciation for traditional skills and hands-on craftsmanship. He founded Voodoo Choppers in 1999, building a reputation for custom motorcycle fabrication and creative metalwork.
Eric is the creator and host of the public television series A Craftsman’s Legacy, where he travels the country meeting craftsmen, learning their trades, and sharing the stories, techniques, and traditions that keep American craftsmanship alive. His passion for making things by hand extends beyond metalworking into woodworking and wood carving, with a particular interest in spoon carving, traditional carving techniques, and modern power carving methods.
As an advocate for working with your hands, Eric is dedicated to encouraging others to explore their creativity, develop practical skills, and experience the satisfaction of making something themselves. He is also the author of A Craftsman’s Legacy: Why Working with Our Hands Gives Us Meaning.